Cosplay photography tips!
If you’re new to cosplay photography, it might feel intimidating to get started. After all, when you see so many beautiful cosplay photos, who will you ever live up to that standard? Let’s face it though; everyone starts somewhere. So I’m here to help you be the best cosplay photographer you can be!
In this article, I’ll give you 25 useful cosplay photography tips you need to know. Not only are these tips very handy, they will elevate your cosplay photography skills.
Without further ado, let’s get started!
Getting started with cosplay photography
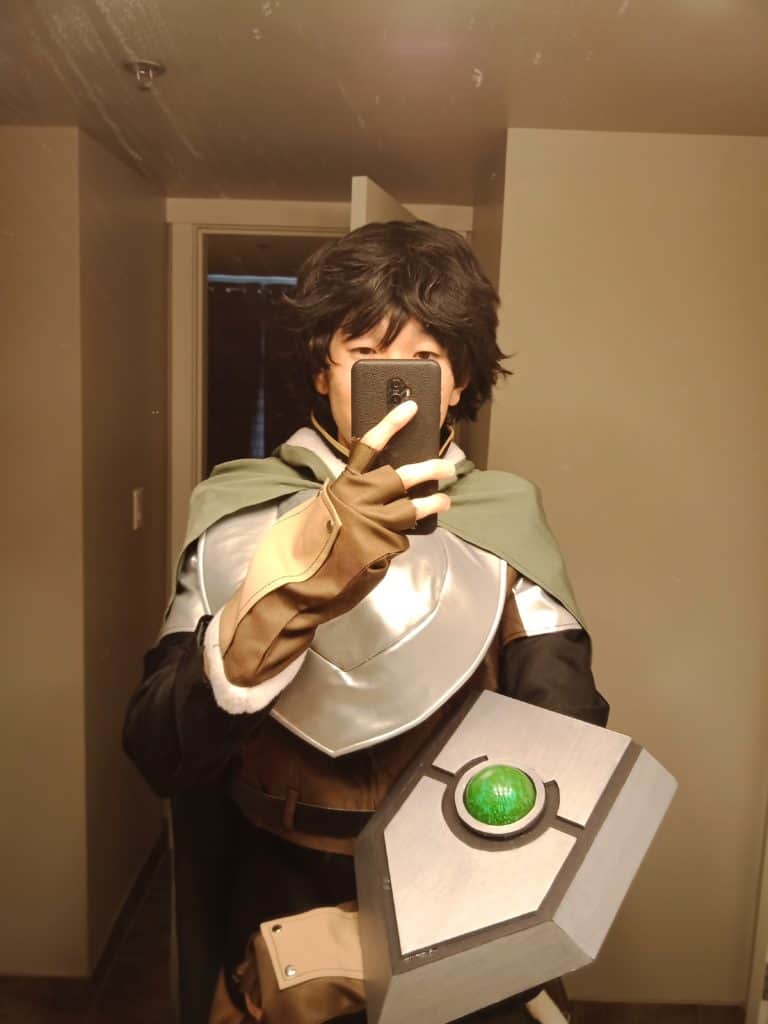
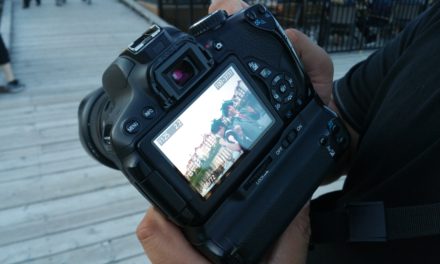
1. If you don’t have a DSLR or mirrorless camera to get started, you can always start with your smartphone first (I know you have one!).
Why is that? It’s because 70% of cosplay photography is skill and technique. The other 30% is about the actual equipment. That’s how one cosplay photographer describes it. So if you are just getting started, don’t worry about buying fancy equipment yet. Just focus on getting better with your photography techniques.
2. When it comes to cosplay photography, your own skills and techniques is FAR more important than the equipment you’re using.
So if you’ve never done any photography in your life, a $10,000 camera won’t help you take better photos. On the flip side, you can get some great photos by just using your smartphone, at least to start with.
After all, when you’re just starting out, as long as you have something that takes photos, then it doesn’t matter how powerful or how high the pixel quality is. The whole point is to learn how to get good with the camera and using techniques to take great photos.
3. You should upgrade your cosplay photography camera ONLY when you feel it’s necessary to.
So if you’re just starting out and still practicing how to take photos with your Smartphone, then stick with your phone for now! You’ll know when you’re ready to take the next step; when you feel your smartphone is limiting the possibilities of what you can do with photos, that’s when it’s time to upgrade to something better.
4. When you are ready to upgrade, do choose wisely.
Purchasing a camera is similar to purchasing a game console and the video games for it. Once you choose a specific brand and model, you will have to commit to that brand if you want to upgrade. If you choose a Canon or Nikon as your base camera, you will have to stick to that particular brand when you go for new lenses or upgrades. So you definitely want to do some research and testing out before making a purchase.
5. What are the differences between cosplay photography and regular photography?
Let’s break down the similarities and differences between “regular” photography and cosplay photography:
| Similarities of cosplay photography | Differences of cosplay photography |
| A lot of the time with cosplayers, you’re doing portrait photography. Up close and personal | Since the costume can be exotic and eccentric, you’ll have to adjust your photography settings accordingly (e.g. bright costume colors, large wigs) |
| You’re taking photos of people, much like regular photography | Cosplay usually involves fictional characters in fictional worlds, so the photo editing can vary greatly |
| Basic principles such as lighting, facial expressions and posing still apply in cosplay photography | There are a huge variety of cosplayers with different attributes and skills |
“Cosplay photography is just *Geeky Fashion*. I am oversimplifying it but the same techniques that you use in normal human or portrait photography works the same in Cosplay.” ~Shaded Lenz
Cosplay photography tips during a photoshoot
6. Try to get to the photoshoot location early to set up things such as lighting.
If you’re shooting outdoors, this isn’t a big issue and you can start the photoshoot right away when the cosplayer arrives. But if you’re doing a photoshoot indoors, then getting the lighting right will take a lot more time. So if that’s the case, arrive a little bit early to get the perfect setup for the lighting.
7. Ask the cosplayer what they want to highlight in their costume, especially if they are competing and want to build a portfolio for a future masquerade. ~luirae
This goes hand in hand with communicating with the cosplayer before the shoot. Knowing what they want will definitely help achieve the photos they desire.
Don’t be afraid to communicate with the cosplayer. You definitely want to talk to the cosplayer and ask them questions. What type of photos are they looking for? Do they have any accessibility issues that they need help with? And sharing photo ideas with the cosplayer.
8. Don’t touch the cosplayer in any way unless you need to; just ask before you touch. Not only are costumes fragile, it’s also “creepy” in general to touch without asking.” ~luirae
The golden rule of asking permission before doing, definitely applies here. If you want to know more the golden rules of cosplay, click here to read my article about that.
9. Ask what type of photo edits the client would like. Some cosplayers are very particular regarding the final images and often dislike it when photographers do not edit out things like messy wigs.”-luirae
I wanted to add to this, because some cosplayers also do NOT like their bodies being edited. For example, if they’re a plus size cosplayer, they may not like it if you try to slim them down in the photo edits. So be careful with edits, and ask the cosplayer first before going ahead with them.
10. For cosplay photography, you want to have soft lighting over hard lighting.
Soft lighting gently rolls along the cosplayer/subject, whereas hard lighting highlights the unflattering parts of a face like wrinkles and chubby cheeks! Examples of soft lighting: outdoors in the shade, golden hour. Example of hard lighting: flash on the camera, taking photos directly out in the sun.
11. When it comes to making money cosplay photoshoots, you don’t have to wait till you’re a professional to start charging money.
You can always test the market out by posting on Facebook, trying out a price and seeing if any potential cosplayers would be interested in your rate. The more photoshoots you do, the bigger your portfolio will be and the more positive experience you will get!
I do recommend getting some practice in and building a portfolio of cosplay photos first, before you start charging. That way, your potential clients can see how your work is, and decide if they want to get their photos taken with you.
12. “Look up the character before shoot, even a quick few minute can give you a grasp of the character personality and vibes –> helps with posing and composition.” – Tutu
Do research on the character that the model is dressing up as. Do a quick Google search online and look up the character that your model cosplayer is going to dress up as. See the type of gestures and facial expressions they do. What’s their personality? These types of things will help you think of poses you can do with the cosplayer.
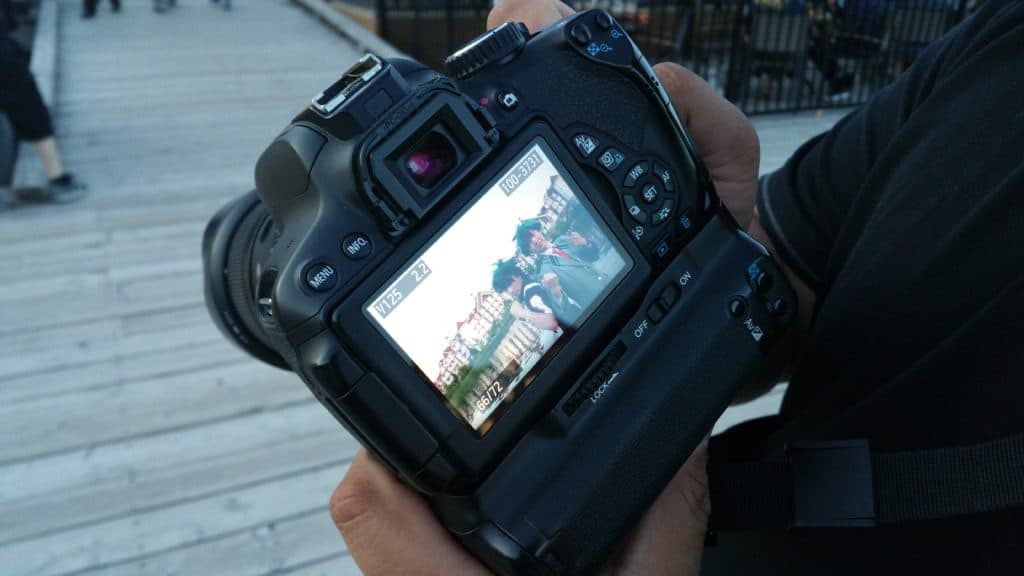
13. Always show your client the photos during the shoot so they can adjust or fix things. Cosplayers usually focus on specific parts of their own costume and if something is off, they will notice it and will want to fix it.-luirae
That perfectly describes me during a cosplay photoshoot! I highly recommend letting the cosplayer/client take a peek at the photos from time to time. You might think their costume is okay, but the cosplayer may not feel that way. For example, maybe their wig is off. Or part of their costume was flipped the wrong way.
By letting the cosplayer check the photos, they can point out something and make adjustments. It’s far better than taking all those photos, only to realize something wasn’t right and having to live with them, or doing more work on Photoshop to fix it.
Cosplay photography techniques
14. Follow the Rule of Thirds to make your cosplay photos more exciting.
The Rule of Thirds is one of the most important rules of photography. In short, it’s about making your cosplay photo more interesting, instead of doing the typical static photo where everything is squared in the middle. In this case, you want to take the photo of the cosplayer AWAY from the center to make the photo more compelling. It also involves lining up things such as their eyes and the horizon to specific points in the frame.
You can watch the YouTube video below explaining the Rule of Thirds:
15. A popular style of cosplay photography (or portrait photography in general) is the “shallow depth of field.”
This is where the cosplayer is focused, while the background is blurry. You can achieve this by simply using high aperture (i.e. lower f/stops on the camera) and moving the cosplayer and background away from each other as much as you can. That way, the background will be blurry but the cosplayer will be shining beautifully in the photo!
16. Avoid tilting your camera 45 degrees; it’s called the Dutch angle and it looks bad and amateur, especially when cosplay is usually meant to be a cinematic shot. ~luirae
The Dutch angle is a risky technique to use. If you tilt your camera to get that interesting angle, it can look really cool, or like she said, bad and amateur. I wouldn’t recommend using the Dutch angle as your main source of photos; do it as a side photo.
17. For a cosplayer that isn’t used to getting their photos taken, sometimes candid photography works really well!
This is taking photos of them during the photoshoot without them getting ready for it. An example is asking them to pose, and then taking a second photo right after they’re done posing. Often, you get a more natural and even better photo than the one where they posed. This is how you get natural emotion and can get some great photos from this.
Be sure to ask the cosplayer first if it’s okay to take some candid shots of them. If they’re cool with it, then go ahead and take those photos when they’re not posing.
Tips during an Anime/Comic convention
18. Be wary of shaky hands while holding the camera, as a photo can turn out blurry if not holding the camera still.
While shaky hands are a bigger issue with slower shutter speeds, it can definitely affect your photos during a long photoshoot. A photo can be easily out-of-focus if your hands are trembling or your arms are fatigued. So be sure to take a little break during the shoot so your arms get some rest. And be sure to rest your arms on your legs, not your knees.
Consider buying a battery grip so it’s easier to take photos and less fatigue on your arms.
19. “Know the risks that come with taking someone’s photo, not just the permissions, but the social and professional boundaries that come with it.” ~Shaded Lenz
If you’re new to the cosplay community or to Anime/comic conventions, you may not know all the rules regarding photography. Things such as asking permission before taking a photo, they are very important. So if you’re unsure about the rules, you can read my guide about cosplay photography etiquette here.
Here’s a full video explaining how to get permission to take a cosplayer’s photo:
But definitely the most important cosplay photography etiquette rule; always ask for permission first. Whether it’s touching a cosplayer, holding their cosplay props or wanting a photo, be sure to ask permission first. You don’t want to startle or surprise anyone.
20. If you’re looking to shoot outdoors, the best time is definitely during golden hour.
This is basically one hour after sunrise OR one hour before sunset; the sun is at a perfect lighting to take outdoor photography. So if you and your cosplay photographer have a flexible schedule and planning to shoot outdoors, then try to schedule it either one hour after sunrise or one hour before sunset. That way, you’ll get the best lighting possible during Golden Hour! The Sun will provide you with perfect lighting.
21. The easiest way to practice cosplay photography without any commitments is by attending Anime or Comic Con conventions and taking hallway shots of cosplayers.
While attending a convention, if you see someone wearing an awesome cosplay, ask if you can take their photo and give them your business card so they can find you online. Not only is this a great way to network, but you also get some practice taking photos of cosplayers. I know a lot of cosplay photographers who got started this way; they simply attended a convention, took a bunch of pictures of cosplayers, and the rest is history!
Improving your cosplay photography
22. “Cosplay Photography ultimately is storytelling and that’s how I see it. I’m the narrator of my own story.” ~Shaded Lenz
This is more of a general photography tip but it definitely applies to cosplay photography as well. Always try to tell a “story” with your photo. By telling a story and eliciting emotions from your photos, you will make your cosplay pics a lot more intriguing and interesting!
23. Don’t look down on prime lens!
Although they cannot zoom like a telephoto lens, they can give you great quality photos. On top of that, they are usually a lot cheaper to buy.
24. We recommend shooting all your photos in the RAW + JPEG on the camera.
Although it takes up way more space on your camera’s memory card, you will have far more editing options with RAW files. Plus if you made a mistake while taking the photo (e.g. not enough lighting), you can fix that mistake much more easily than with a JPEG file. With that said, JPEG files are a lot easier to edit. So why not have both options?
25. Don’t be afraid to play around with your photography settings.
When you’re not taking photos of cosplayers, go ahead and try out new settings. You never know; you might find a setting that works even better than the one you’re already used to. For example, when you’re not doing any photoshoots, go mess around with the ISO settings, even if it makes your photos more grainy! If you’re using a DSLR, you have so many options and modes to choose from!
Summary
To summarize, here are the 25 cosplay photography tips you should know:
- You can always start with your smartphone first.
- Your own skills and techniques are more important than the equipment.
- Upgrade only needed.
- Choose your brands wisely.
- Differences between cosplay photography and regular photography.
- Get to the cosplay photoshoot location early.
- Communicate with the cosplayer.
- Ask before touching.
- Ask about editing cosplayer photos first.
- Soft lighting > hard lighting.
- It’s okay to charge money for photoshoots, no matter your skill level.
- Do some research on the cosplayer’s character; it’ll make a huge difference.
- Show the cosplayer the photos DURING the shoot.
- Follow the Rule of Thirds.
- Shallow depth of field is super popular!
- Avoid Dutch Angle for cosplay photography in most cases.
- Candid photography can be great.
- Be mindful of shaky hands.
- Familiarize yourself with photography rules at an Anime/comic convention.
- Golden Hour is best hour.
- Hallway shots provide great practice opportunities.
- Photography = storytelling.
- Prime lens = not bad.
- Make sure all your photos are taken in “RAW + JPEG.”
- Get your hands dirty and mess around with your photography settings!
And there you have it; 25 cosplay photography tips to help you improve! I hope you found this post useful.
If you want more helpful guides on cosplay photography, check out these other articles:
- How To Do A Cosplay Photoshoot: The Ultimate Guide
- How To Get Started Into Cosplay Photography (Step-By-Step Guide)
- 10 Cosplay Photoshoot Etiquette Rules You Need To Know
If you have any questions or cosplay photography tips you want to share, leave them in the comments below!
My name is Roger Senpai. I’m a cosplayer that’s been in the community for well over a decade now. I’ve traveled all over the world to Anime and Comic conventions and hosted my own cosplay events. Now I’m writing articles for new and experienced cosplayers like you to help inspire, save you money and improve your cosplays!