This article is a complete guide on cosplay makeup for beginners!
Makeup is a fun and artistic way to portray your favorite characters. Whether you’re going to a con or self-shooting in your backyard, your cosplay makeup skills is an important part of your costume.
This article is a cosplay makeup for beginners guide that will help you with everything you need to know about using makeup the best way possible.
Here’s how we will go through these cosplay makeup tips, in this order:
- Base (where all cosplay makeup starts)
- Contouring (using cosplay makeup to accentuate your best facial features)
- Eyes and Lashes (using cosplay makeup to look like the character)
- Lips (big cosplay makeup tips: your mouth is important!)
- Cosplay Character-Specific Touches (adding extra touches to your cosplay makeup)
- Body Paint (if applicable)
- How to keep the cosplay makeup on all day
- Cleaning all the cosplay makeup off
If you’re already experienced in one or more of these areas, you can always skip to the next section of this cosplay makeup for beginners guide. But if you’re just starting out, start with the Base and work your way through this guide!
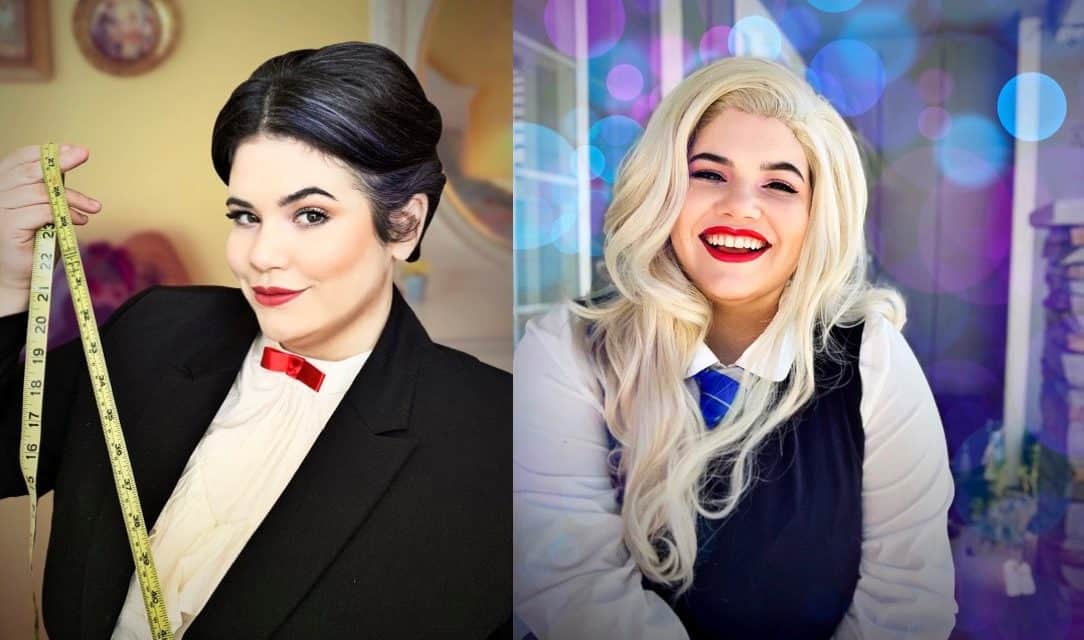
1. Base (where all cosplay makeup starts)
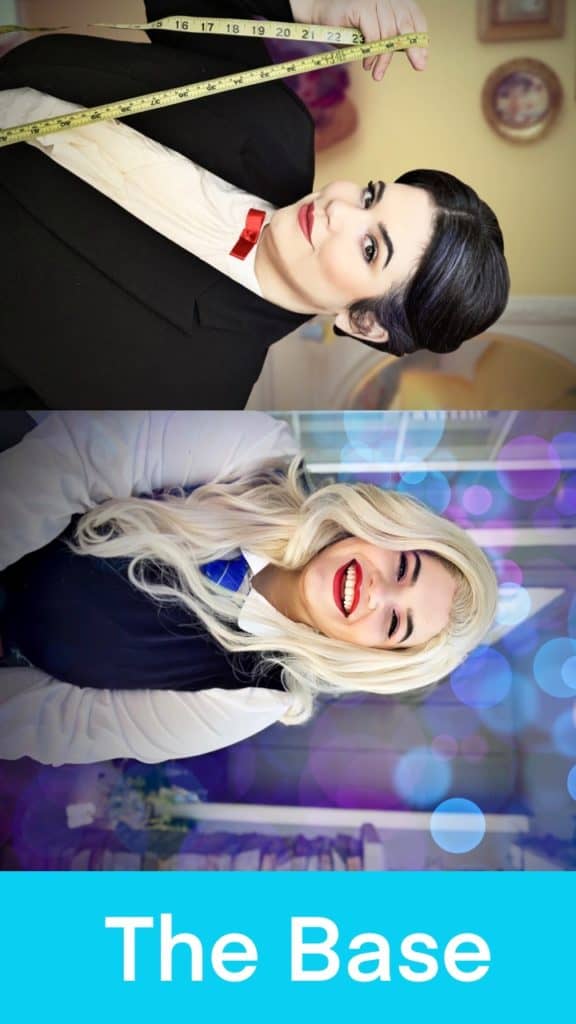
When it comes to cosplay makeup for beginners, all good makeup starts with your base. This is where you add foundation before any cosplay makeup products go on your face. But before you do that, you need to clean it first. Your skin is the largest organ of your body, so keeping it hydrated, hygienic, and moisturized is the best way to prep for any makeup application.
Cleanse your skin and moisturize at least 20 minutes before putting on your makeup; this allows ample time for your skin to absorb the moisturizer fully. To prep your base, use a primer. My favorite is the Poreless Primer from ELF to create a smooth surface whenever I am applying my makeup.
For foundations, I have found a matte medium-to-high coverage to be the best for cosplay looks, especially for taking photos. A flat, matte base allows light to hit your skin evenly in photos. On the flip side, a dewy or even satin finish can reflect the light back at the camera, which usually isn’t good for photos (although it’s worth mentioning that dewy/satin foundation is shiny, so it can be an interesting choice, depending on your character).
The foundation I use is Maybelline Super Stay Foundation. Finding the perfect foundation for you can be hard, so I suggest buying a few colors from the store and returning the ones that don’t work. Stores such as Target allow you to try out foundation and return them if they’re not the right one for you.
Now it’s time to start applying the foundation with a beauty sponge or brush. Lightly tap and brush to blend the pigment into your skin evenly. If you have extremely dry skin, I always suggest using a wet Beauty Blender when applying foundation.
After you’ve put an even base of foundation on your face, it’s time to apply Concealer to your “problem areas (e.g. acne, dark spots).” I like to conceal the redness on my chin and nose, and on my dark under eyes. I use the Maybelline Age Rewind Eraser but I sometimes like to use a brightening concealer under my eyes as well. I always set my skin after this step with a setting spray.
2. Contouring (using cosplay makeup to accentuate your best facial features)

It’s time to add some contouring. What is that? Contouring is a technique to sculpt your face so that it highlights the “good” parts, so to say (e.g. strong jawline, nice cheekbones).
Now that you’ve created an even base to play on, it’s time to add definition using contour and highlight. I normally use a powder in a few shades under my skin-tone, but cream contour is a great option as well. When applying a powder, I like to use an angled fluffy brush but if I am using a cream for a more defined and dramatic look; I will use a wet Beauty Blender to blend out the contour.
Determine the look your character needs to portray. Feminine-shaped faces contour differently from Masculine-shaped faces, and vice versa.
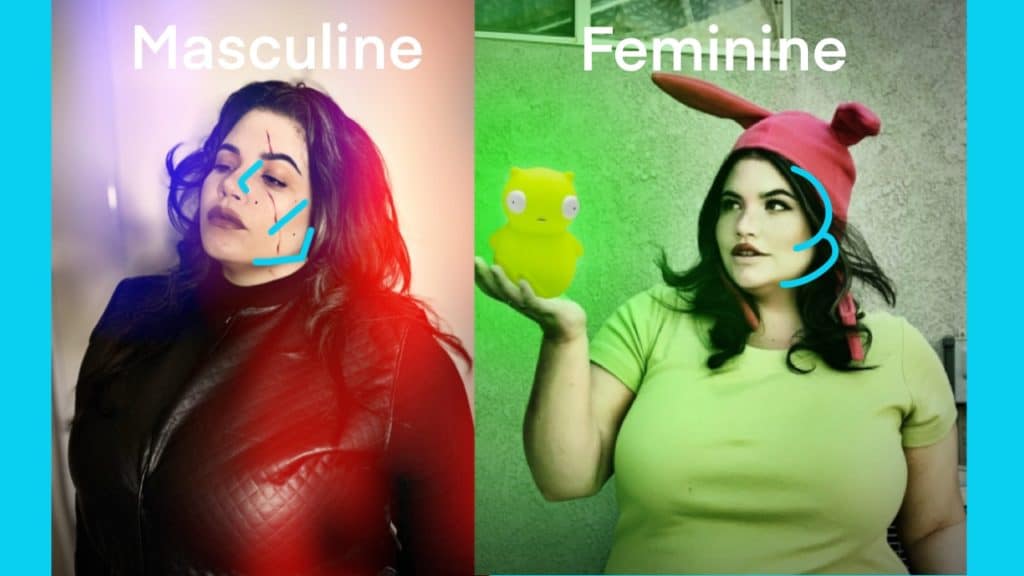
For feminine faces, contour the face in the shape of a 3: forehead, under cheek bone, chin. I like to keep my contour very light on my forehead, since my forehead is short and I don’t want to lose any of that real estate. I contour super heavily on my chin since I want it to be more defined than real life. Remember to blend into your neck to avoid harsh lines. Noses can be contoured to look more sharp, shorter, narrower, or crooked. Look at your character and decide how you want to portray them. Do they have blush on, or are they more stark and dramatic?
Masculine faces are sharper and less soft. I contour masculine faces more angularly. Think of an L shape for your chin, an angled \ shape for your cheek bone, and straight down your nose. Masculine brow bones are usually stronger and you can achieve this by contouring under your brows as well.
Blush colors are highly dependent on the character and their hair color. Are they light and bubbly? Maybe a bubblegum pink. Do they have fire engine red hair? An orange/ bronze might be perfect.
This is a place to experiment and find how you want to portray your character. This includes highlighting.
Highlighting the high points of your face with a light matte powder sets your foundation, but if you would rather a POP, highlight with a shimmer or a glitter for a more ethereal look. Highlight your cheekbones and the tip of your nose, anywhere you want the light to catch. I also highlight the Cupid’s bow of my lips when I am looking to do something super glamorous.
3. Eyes and Lashes (using cosplay makeup to look like the character)

The next cosplay makeup for beginners section are about your eyes and lashes. Eyes give you the ability to play around with techniques to get the look and feel of your character.
I start my eyes with a primer which helps to keep your eyeshadow from creasing. Then I use an eyeshadow shade the same as my skin-tone on my lid.
I follow the rules I learned from doing theatre makeup in school; to get the audience to see you, they need to be able to see your eyes. Keep the lid light, the crease dark, and highlight your brow bone.
To make your eyes look bigger, either use a white or your skin-tone color eyeliner on your lower waterline (the area closest to your eye) and contour your lower lid to give that doe eye effect. Blend using a small clean fluffy brush and use light circular motions. I have quite small-hooded eyes, so I use darker shades of brown and taupe to contour my lids and I blend it out into a cat eye shape for a larger eye illusion.
Color can be so much fun to incorporate in cosplay looks! So you should ask yourself, “What are the colors of my character?” Even if it doesn’t look like your cosplay character is wearing eyeshadow, you can take your creativity into your own hands. For example, if your character has unnatural colored eyes, bring that color onto your lid and you can shimmer eyeshadow on it. The inner corner of the eye will catch the light and make your eyes look brighter and more awake.
Eyebrows change for every character; what color, shape, size are they? I start with a brow pencil and start making small hairs to fill out the shape. I set my eyebrows with a clear gel so the hairs don’t wander. Changing their color can be tricky, so I start with a white cream eyeliner to give myself a base. I use eyeshadow with an angled brush to pack on the color. You can always skip that step if you have light colored eyebrows. I sometimes use colored eyeliner, but find that the eyebrow method gets me bright colored results.
Masculine eyebrows are usually much more blocky and thick. If not straight across, they have a sharp angle. Feminine eyebrows run the gambit of size and shape; and changing the shape of your eyebrows will change the framing of your face. Blocking out your eyebrows is a method used by cosplayers and Drag Queens forever, and it’s a little hard to master. There are a million tutorials on the internet to try, and practice, practice, practice.
Eyeliner comes in many forms, but I have found liquid pen eyeliner to be the best for defining cosplay eyes. The Nyx Epic Ink Liner in black is my Holy Grail liquid pen liner. You can get a super sharp cat eye and draw on details like lashes or tattoos. I use pencil eyeliners for my lower lash line because they are good to blend and smudge out. And I still use eyeliner for masculine looks, because it is important to define the eyes either way. For that I use reddish browns on myself and coffee browns/ eggplant purples on darker skin tones.
Lashes are the cherry on top of a good eye look. I normally use a voluminous mascara heavy on my top lashes and lightly on the bottoms. My eyes are hooded so using false lashes usually covers up all the hard work I did with my eyeshadow so when I am looking for a false lash, I try to find a “whispie” or I use single lashes and apply them to the outer corners of my eyes. Look at your cosplay character, what kind of lashes do they have? Big and sultry, or round and cute? There are so many options for lashes, and they all do something different. I love how easily available and accessible the Arda brand is, and duo lash glue is the winner for me.
4. Lips (big cosplay makeup tips: your mouth is important!)
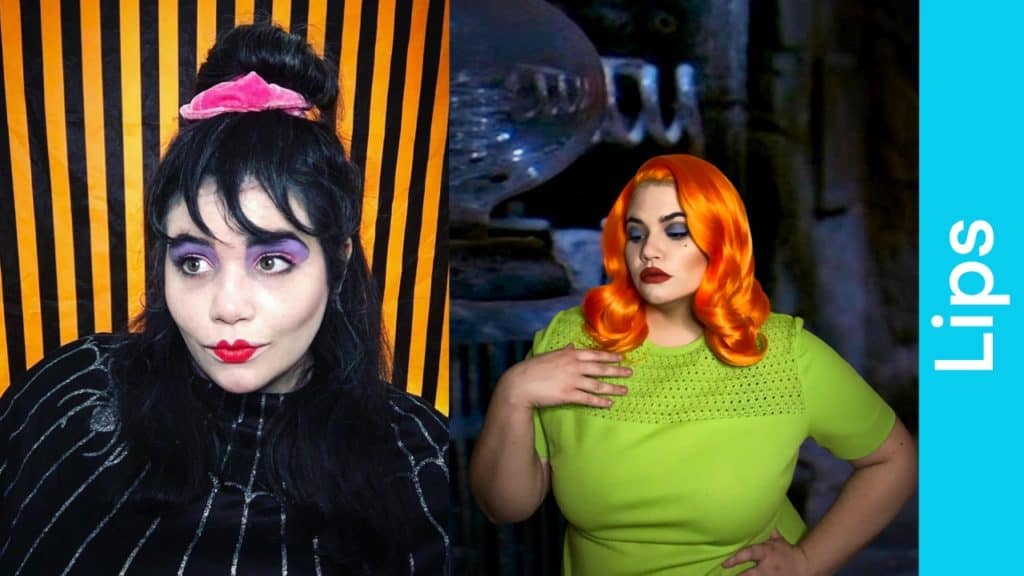
Don’t forget your lips when it comes to cosplay makeup for beginners! Lip color is important even when doing masculine looks. Lip color makes sure you can see your mouth in photos.
For natural “no makeup” looks, I always choose a slightly darker shade than my skin tone; taupe for masculine looks, and peach or pink for feminine looks. Dark skin tones look amazing with chocolate browns and nudes. Even purples give amazing definition and classic reds are classic for a reason. Don’t shy away from color!
I always line my lips in the shape I want before going in with lip color. For over-lining my lips, I use a slightly darker than natural shade to give the allusion of shadow. I like to follow the original contours of my lips and over line above and below the natural shape. For underlining I make sure I have concealed my lips using my normal concealer so the natural color of my lips don’t mess with the illusion. Play with the shape to get the perfect pout for your character.
For lipstick, I love to use a liquid lipstick that has staying power; Sephora, KVD, and Maybelline all have excellent options in a range of colors. Regular lipstick smudges and can bleed, but is more comfortable to wear. I like to add a bit of gloss to some characters I want to show off their lips. Remember to treat your lips the same way you treat your skin; I always exfoliate my lips with a sugar scrub and balm from Lush when I am doing my skincare.
5. Cosplay Character-Specific Features (adding extra touches)

Now let’s look at our character again! Do they have freckles, a tattoo, a scar? What are the features on their face that makes them the most recognizable?
For moles and freckles I use the Nyx Epic Wear Liquid Linerin brown. An ink well brush liquid liner like the Nyx Epic Wear allows me to get really good control of the size and shape I am making.
For freckles I have a nifty trick I have been using since I was in high school. First I take my liner and dot a few freckles on my cheek, in a small area and in a random pattern, then I take my finger and tap my new freckles all over my cheeks. The effect looks more natural than drawing each dot on. Practice on your hand before trying it on your face; if it starts to look like the freckles on a banana then you’re on the right track. Switch it up! Are you a fantasy character? Try this method with white eyeliner or purple. It’s your cosplay, have fun with it.
Simple scars can be done with cream eyeliner or a pencil. I’ve even used a regular lipstick in a pinch. The trick with scars is to go slow. Map out your scar with a natural eyeshadow before drawing on the line to contour the area and to act like a guide. Healed over scars are slightly lighter than the skin tone, fresh scars are reddish and have redness around the wound. Always look at plenty of reference images of your character when drawing on their characteristics.
Drawing tattoos can be tricky especially if they have words. Remember the word will be mirrored and you will be writing it backwards, so it is best to look at the tattoo in shapes not as the word itself. I’ve fallen victim to this many times and my Harley Quinn (Birds of Prey) cosplay has suffered.
6. Body Paint (if applicable)
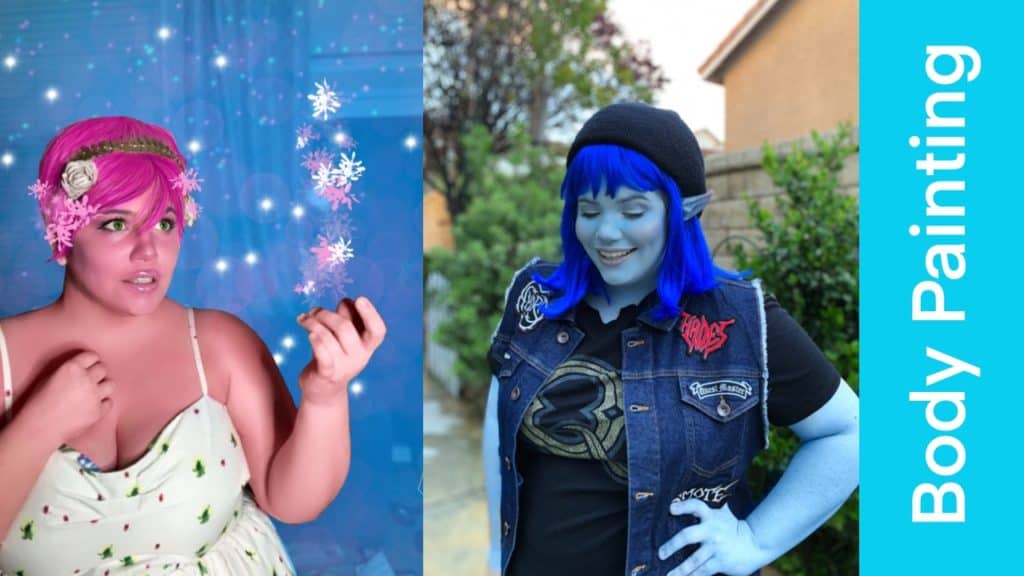
Although this cosplay makeup for beginners guide mostly focuses on your face, we also want to dedicate a section for body paint.
Characters with fantasy skin tones are so much fun, but they can seem a little challenging at first.
First you need to pick your material. For body paint I always suggest beginners start with a water-based face paint. Mehron’s Paradise paint is the best and it comes in so many colors. As you get better at body painting, an airbrush can cut your painting time in half, but it is very hard to do by yourself. For water-based paint, be careful when eating and drinking. Straws are a must!
When contouring body paint, it is important to vary the colors since body paint doesn’t have natural variations like skin does. I use matte eyeshadows in dark shades for my contouring and light shades to highlight. I look to my characters for inspiration on how to proceed. For something like Ms. Argentina from Beetlejuice, she is a greenish teal color. So I used a base of teal body paint, a dark blue to contour, and a grassy green to highlight. For something like Barley from Onward, I added a little pink to his cheeks and the tips of his ears.
7. How to keep the cosplay makeup on all day

Don’t let the con take your cosplay makeup down! Do what you can to give your look a fighting chance. Here’s how!
Before the convention, do a Costest at home! The best chance for success is practice; do a costest before going to the con to make sure you like how you look. Planning your makeup procedure in advance will make your morning of the con so much easier. Doing a costest allows you to experiment, make changes, and see if any of the products you are using are uncomfortable in any way.
Wear your costest for a couple hours inside your homeand see where your makeup is creasing, anticipate what you will need on con day. Do your eyes water and you think you should bring makeup wipes and your eyeliner for touch ups? Is your skin oily? Would powder and blotting papers better for you? Better to find out before a convention than during one.
During the convention. Priming your skin and setting it with spray is the best way to shield your makeup. Also, doing simple things like NOT touching your face and eating your convention pizza with a fork/knife will help. Keep a compact with a translucent powder and your lip color in your con bag for touch ups on the con floor. I always bring my setting spray too, because my skin is dry and a quick spritz can refresh my face.
8. Cleaning all the cosplay makeup off

It’s 10 p.m. and the con floor has been closed for hours and your after-hours panel is finally coming to a close. You and your friends head back up to your room and it is finally time to clean the day, and your makeup, off.
My number one tip for makeup removal is to double cleanse. Use makeup wipes to get the first layer, and follow up with facial cleanser and water. Remember to moisturize after cleansing. For water based body paint, never fear, a shower and a good body scrub is all you need.
Summary
To summarize, here are all the steps for your cosplay makeup for beginners guide:
- Base
- Contouring
- Eyes and Lashes
- Lips
- Cosplay Character-Specific Touches
- Body paint
- How to keep the cosplay makeup on all day
- Cleaning all the cosplay makeup off
Cosplay makeup brings the finishing touches to your look, and your character to life. Just like prop making, sewing, or photo editing; cosplay makeup is an important part of the process that comes with practice and experimenting. Remember to give yourself plenty of time, use reference photos, and plan ahead! We hope you found this cosplay makeup for beginners guide useful!
~Qfacepaint Cosplay
- Facebook: https://www.facebook.com/Qfacepaint-Cosplay-116145280300230
- Twitter: https://twitter.com/qfacepaint
- Instagram: https://www.instagram.com/qfacepaint/
- YouTube: https://www.youtube.com/user/qfacepaint
If you enjoyed this post, check out these other articles:
My name is Roger Senpai. I’m a cosplayer that’s been in the community for well over a decade now. I’ve traveled all over the world to Anime and Comic conventions and hosted my own cosplay events. Now I’m writing articles for new and experienced cosplayers like you to help inspire, save you money and improve your cosplays!