How to edit cosplay photos!
If you didn’t know, photos are a HUGE part of cosplaying. Without photos (and photographers by extension), we wouldn’t be able to see the wonderful things that cosplayers do. But today, we have social media and websites to see all the amazing cosplays out there.
Now if you want to be part of the world of cosplay photos, then you’ll find it absolutely fun and motivating. Whether you’re a photographer or a cosplayer yourself, you can take part in editing cosplay photos. That’s what we’ll be talking about today!
In this post, I’ll go over 10 tips on how to edit cosplay photos. Whether you’re a beginner photo editor or have some experience yourself, you’ll find these tips helpful and useful. That way, you can have the cosplay photos the way you want to.
Without further ado, let’s get started!
1. You don’t need to be an expert to edit cosplay photos.
Contrary to popular belief, you don’t need to be skilled at complicated programs such Adobe Photoshop or Final Cut Pro. Back in the day, perhaps you did. But now you have so many photo editing programs that you can use, such as Snapseed or even Instagram itself. There are so many apps and desktop programs that make photo editing a LOT easier than it was 10-15 years ago.
Unless you’re publishing for a magazine or something like that, then you don’t really need an advanced program in my opinion. You can do most simple photo editing on apps. But hey, if you want to use the strongest and best programs, then by all means go ahead for it. Just know that there isn’t just one way to edit photos; you have so many options these days!
2. Lighting is very important.
I talk more about this in my cosplay photography lighting article (click here to read tips for photography lighting). Unless you’re going for a dark and broody type of look, you’ll want your photos to be nice and bright. I may not be an expert photographer or master editor, but over the years I’ve seen the most popular cosplay photos are the ones that are bright with excellent lighting. During a cosplay photoshoot (link), we try our best to have the best lighting possible. But things don’t always work the way you want to: the sun isn’t out, the building lights are not that great, etc.
Not to fear; that is where photo editing comes into play! Yes, we can brighten photos when they are too dark when needed. Many apps or programs have a brightness feature that lets you adjust the lighting in the photo easily. Although you don’t want to do overdo it, as that can ruin the image quality. But if you happen to take your photos a bit too dark, then no worries! You can play around with the brightness filters to light up your cosplay photos (pun intended).
3. You can remove imperfections easily!
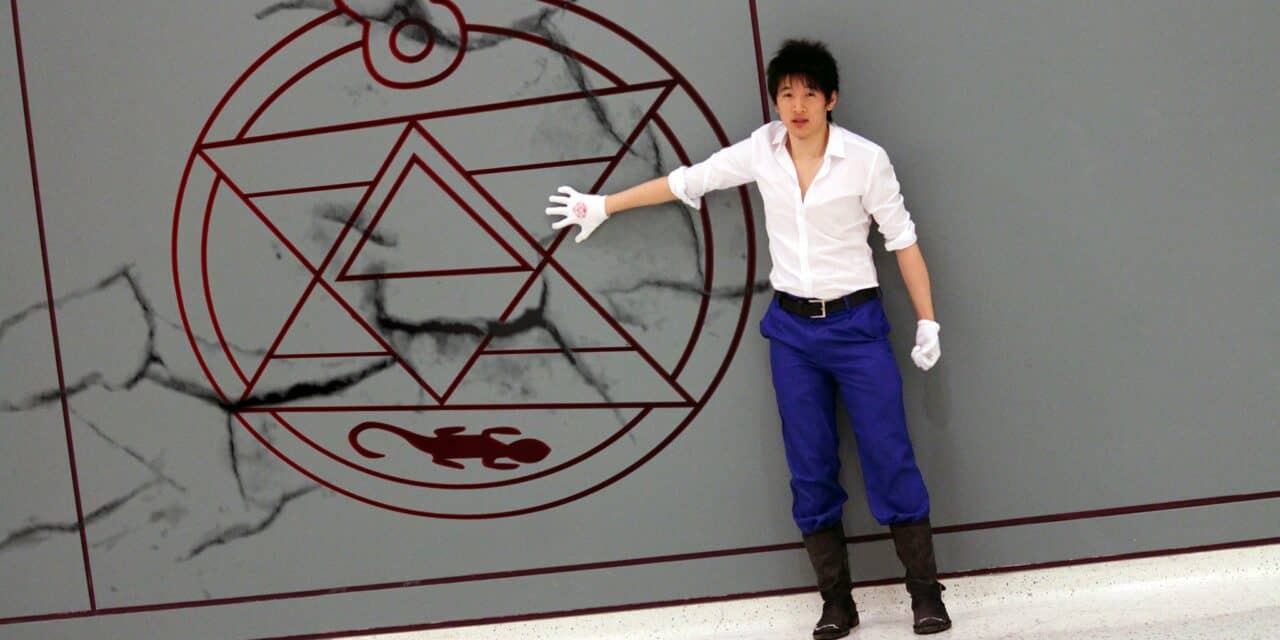
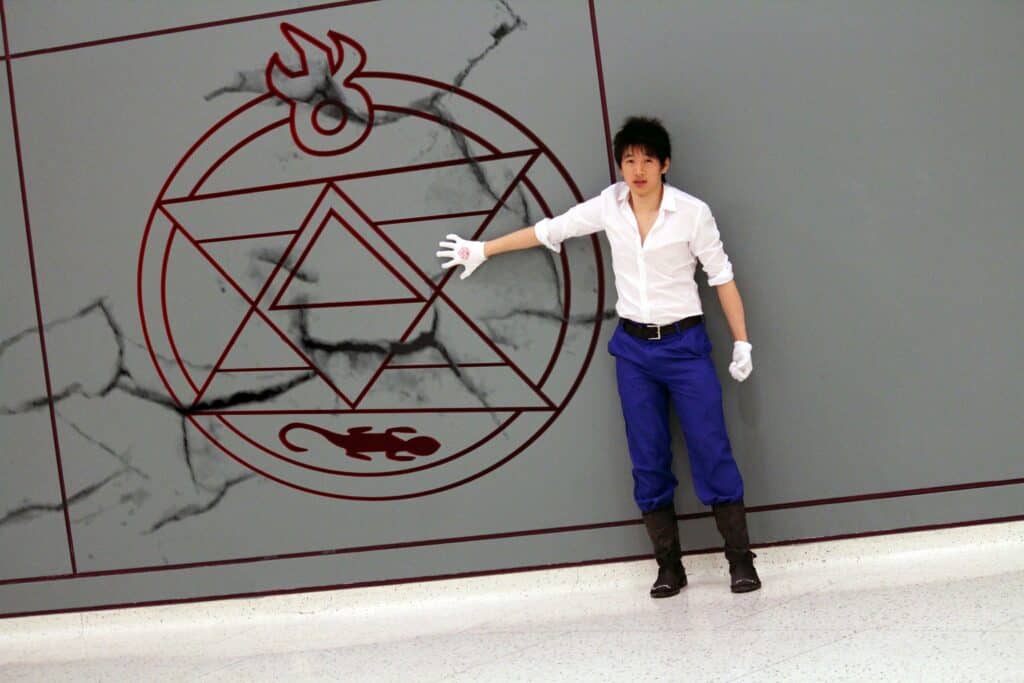
I remember when I was cosplaying as Kaeya from Genshin Impact (click here for Genshin Impact cosplay ideas), I did a photoshoot with a photographer. One of the photos turned out really good! However, I didn’t realize after that one of the accessories on my shirt was flipped inside out. I was like “Damnit, I ruined the photo!” However, the photographer told me not to worry about it.
Why?
He said he can easily “flip” the accessory back the right way when he edited the photo. And indeed he did! When I got the photos back, I was amazed how easily he just manipulated the photo to correct the imperfection in the photo.
This just goes to show how powerful photo-editing software can be. If you know what you’re doing, you can take out things that make the cosplay photo not so appealing.
Some examples include:
- Someone in the background of your cosplay photo (can use magic eraser tools to remove them from the photo)
- Something on your costume looking like a different color (can use coloring tools to keep it consistent)
- Something looking rougher in the photo (can use a softening tool to smooth out the entire photo)
It’s pretty awesome what photo-editing tools can do. But you’ll want to limit these imperfections if possible. Because the more imperfections you have, the more editing you’ll have to do. So if you or your photographer notices anything wrong in a photo, try correcting these things first and take another photo. It’s easier to fix your costume or accessory than it is to edit it on the computer/smartphone afterwards. So keep that in mind.
4. You can add special effects!
I mean, it only makes sense because we are cosplaying fictional characters. There is a lot of fantasy magic going on. Whether it’s those cool-looking Anime attacks or flying in the sky like many characters do, we can make these things look awesome with a photo app. I have seen so many wonderful cosplay photos that really show what the character is all about. That is what makes cosplay so great; being about to show love for your character, especially through cosplay photos.
Depending on what you’re trying to do, it can be a simple edit or something very complicated. If you want to add something special such as a fireball or video game finishing move, then you’ll probably have to use a desktop app to do so. There are many programs out there with special effects that allow you to do this.
If you want to do something like make your cosplay character float in the sky, then that is also possible as well through photo-editing software! Really, the sky is the limit when it comes to adding special effects to your cosplay photos.
Depending on the look you’re going for, you may or may not want to overdo it with special effects though. It can look tacky if a photo has too many special effects in my opinion. So definitely consider and play around with the special effects, and add/remove them as needed.
5. Cropping definitely helps.
If you don’t know, cropping is cutting out part of the original photo to make it look better. This could be as simple as drawing a square box on the outer edges to shrink the photo. Or as complicated as cutting a specific part of the photo in order to remove something that is detrimental. Either way, cropping is always a huge part of photo editing, and cosplay photos are no exception!
Generally speaking, you want the focus of the photo to be on the cosplayer. So if you have a big background with lots of distracting things, then it’s going to ruin the focus of the photo. That’s where cropping comes in; you can cut out those distracting things so that the focus is back on the cosplayer!
Pretty much all the photo editing apps and programs have a crop feature available; it’s one of the most important and basic features to have. Remember to always save a copy of the original photo before doing any cropping. You don’t want to accidentally cut something out and overwrite the original copy; then you won’t be able to correct your mistake! But don’t worry, most programs you can undo a bad crop. At worst, just save a separate copy of a photo so you can play around with different crops to see which one looks best.
6. Adding subtitles and fonts are useful in certain situations.
I’ve seen in some cosplay photos, the photo editor added some subtitles with unique fonts to make the photo look cooler! Like imagine an Anime series with notable fonts that you would replicate for the cosplay photo. It can really enhance things. Just make sure it looks good though, as bad fonts of improperly placed subtitles can make a photo look real cheesy!
7. Shallow depth of field
I talk about this in some of my cosplay photography articles (click here to view my article on getting started with cosplay photography); shallow depth of field. This is where the subject (in this case the cosplayer) is in the focus and forefront of the photo, meanwhile the rest of the background is blurry. Another world for this is bokeh. Shallow depth of field is very popular in cosplay photography, and I highly recommend using this effect for cosplay photos.
For the most part, you want to achieve the shallow depth of field by using lower f/stops on your camera and keeping the cosplayer away from objects as much as possible. That way, the focus IS on the cosplayer. However, if you were unable to do so with the camera, you can also try photo editing to enhancing the shallow depth of field. There is the blur tool in many photo apps and programs to allow you to do this. That way, you can make your cosplayer stand out and shine!
8. Shoot your photos in RAW format
If you own a DSLR camera, then the best thing for you to do is set your camera to save all your photos in RAW format. While this file format will take up a LOT of space in your memory card because of how big the files are, it will be worth it. Raw photos gives you a lot more editing options compared to the standard formats like JPEG.
I remember when I first saved photos in RAW format and uploaded it to Adobe Photoshop, I couldn’t how much more filters I had to play around with! If you really want full control of your photos and use all available options for photo editing, then you definitely need to save your photos in RAW format.
9. Never edit a cosplay photographer’s photo!
If you get your photos taken by a cosplay photographer and they took the time to edit your photos, do NOT edit them afterwards. It’s considered disrespectful to change the photos that your cosplay photographer crafted and made for you. So yeah, don’t slap a silly Instagram filter on your edited photo done by a cosplay photographer.
If you really want to make some changes to the final photo, you can always ask your photographer first before doing so. Either they can do it for you, or ask politely if you can make some modifications.
10. Programs you can use to edit cosplay photos.
Today, there are a TON of programs you can use to edit cosplay photos. With smartphones taking over, you also have apps that can do a great job as well.
I can’t list them all, but here are a few notable ones:
- Adobe Photoshop. The most notable photo editing program of all time, to me there is no program like Photoshop. It is the top of the line with everything you could possibly have with photo editing. However, I would say Photoshop is not beginner-friendly; some of the tools are very advanced and require a lot of skill to use. So while definitely not for everyone, Adobe Photoshop is by far the best program to use in my opinion.
- Adobe Lightroom. On the other, there is Adobe Lightroom which is easier to use than Photoshop and allows you to organize and edit multiple photos at the same time. Lightroom doesn’t have as many tools and features as Photoshop. However, if you are only doing basic edits, then Lightroom is probably all you need. And if you have many photos you want to edit quickly, Lightroom is the best solution. If you want both, then you can easily have both Lightroom and Photoshop via monthly subscription.
- Snapseed. A photo app that’s been around for a very long time, Snapseed is really solid. The app gives you several editing options, including HDR, sharpness and color exposure. Best of all, Snapseed is free to use!
- Canva. Ah yes, Canva has been a very popular photo editing program recently. I myself have used it to make Pinterest pins! I really like Canva as the program is really easy to use and user-friendly. Canva to me has the best editing to add in text to the photo, which can be really useful in cosplay photography.
- Google Photos. If I just need some basic edits like cropping or a small filter, I’ll just use Google Photos. It’s convenient to use and if you have an Android phone, you’ll already have the app installed automatically.
Summary
To summarize, here are the 10 tips on how to edit cosplay photos:
- You don’t need to be an expert to edit cosplay photos.
- Lighting is very important.
- You can remove imperfections easily!
- You can add special effects!
- Cropping definitely helps.
- Adding subtitles and fonts are useful in certain situations.
- Shallow depth of field
- Shoot your photos in RAW format
- Never edit a cosplay photographer’s photo!
- Programs you can use to edit cosplay photos.
And there you have it; 10 tips to help you edit cosplay photos. I hope you found this post useful!
If you have any questions or something you wanted to share, leave them in the comments below.
My name is Roger Senpai. I’m a cosplayer that’s been in the community for well over a decade now. I’ve traveled all over the world to Anime and Comic conventions and hosted my own cosplay events. Now I’m writing articles for new and experienced cosplayers like you to help inspire, save you money and improve your cosplays!